CIGOCIGO phone guide

One phone · one wallet · one real example

Move CIGO to USDT on your phone.

You do not need to understand cryptocurrency before starting. Complete one small step at a time. This guide uses a real 100 CIGO example from beginning to final public receipt.

Before you begin

Three things are needed.

Rabby walletA wallet is an app that holds your digital money and asks you before anything is sent.
CIGOThis is what you are exchanging. Begin with a small amount while learning.
A little BNBBNB pays the network processing fee. Think of it as postage needed to deliver your request.
What do the unfamiliar words mean?
BNB Smart ChainThe digital network carrying the request between your wallet and the exchange.
ConnectLets the page see your public wallet address and balances. It does not spend anything.
Approve exact CIGOGives permission to use only the CIGO amount shown. It does not perform the exchange.
SwapExchanges one digital asset for another. Here it exchanges CIGO for USDT.
Transaction hashThe long receipt number created after the network accepts the exchange.
BscScanA public receipt checker for activity on BNB Smart Chain.

Part 1

Open the CIGO swap inside Rabby.

Use the official Rabby app. Never install a wallet from an advertisement, message, or stranger’s link.

1

Install Rabby from the official page.

Rabby is the wallet app recommended for this CIGO guide. Open rabby.io and use its official app-store button.

Press thisDownload for your phone.

Stop ifAny website asks you to type or send your recovery words.
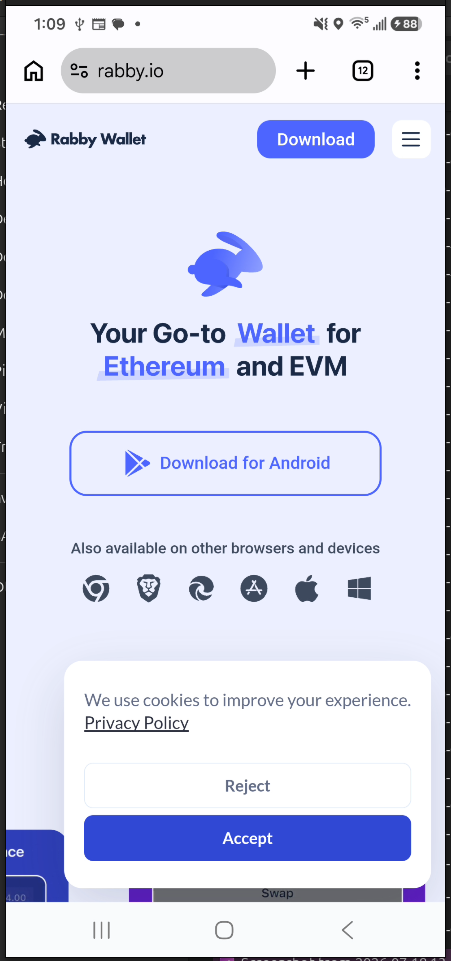
Official Rabby download page on a phone
Official Rabby download page.
2

Open the swap page inside Rabby.

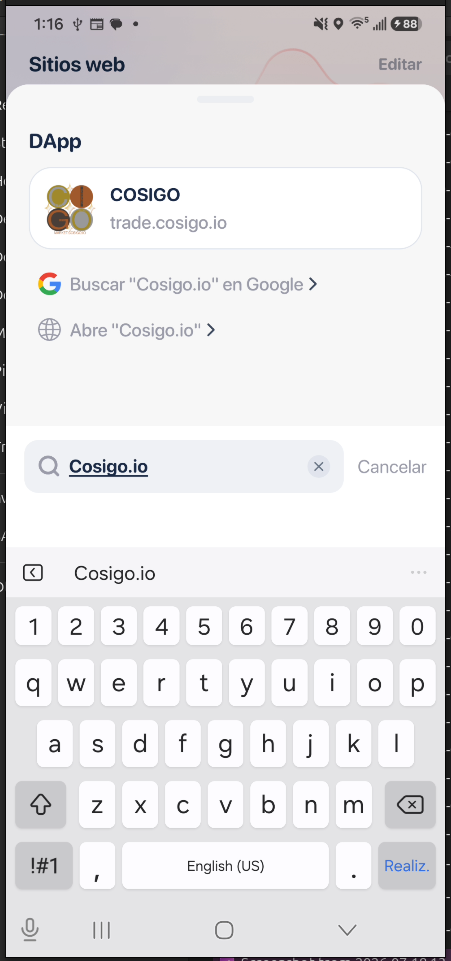
In Rabby, open Sites web. Enter the official address exactly:

Type thishttps://trade.cosigo.io/

What should happenThe CIGO live swap page opens inside Rabby.

Stop ifThe address does not end in cosigo.io.

Entering cosigo.io in Rabby Sites web
Enter the official address in Rabby’s website box.

Part 2

Connect the correct wallet.

Connecting only displays the public address and balances. Rabby still asks before any permission or exchange.

3

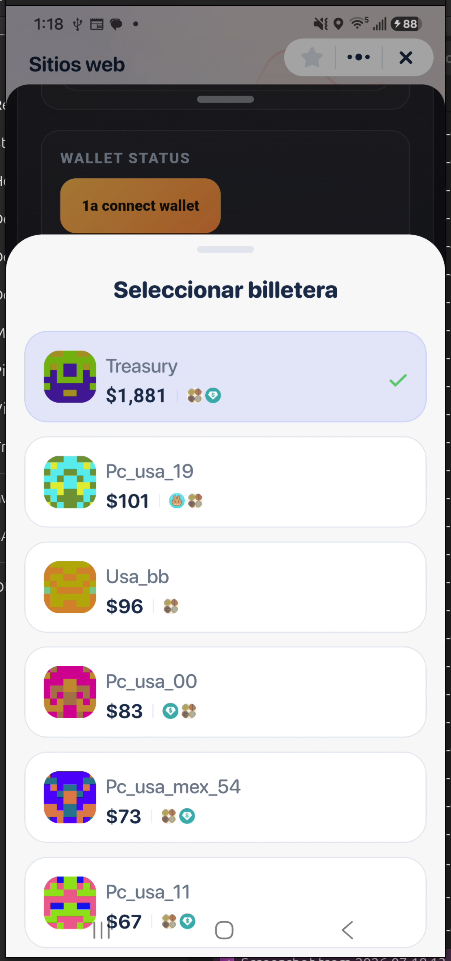
Select the wallet holding your CIGO.

If Rabby contains more than one wallet, select the one that holds the CIGO you want to exchange.

Press thisThe correct wallet name.

Stop ifYou do not recognize the wallet or its balance.

Selecting a wallet in Rabby
This example Rabby contains several wallets.
4

Check the wallet before continuing.

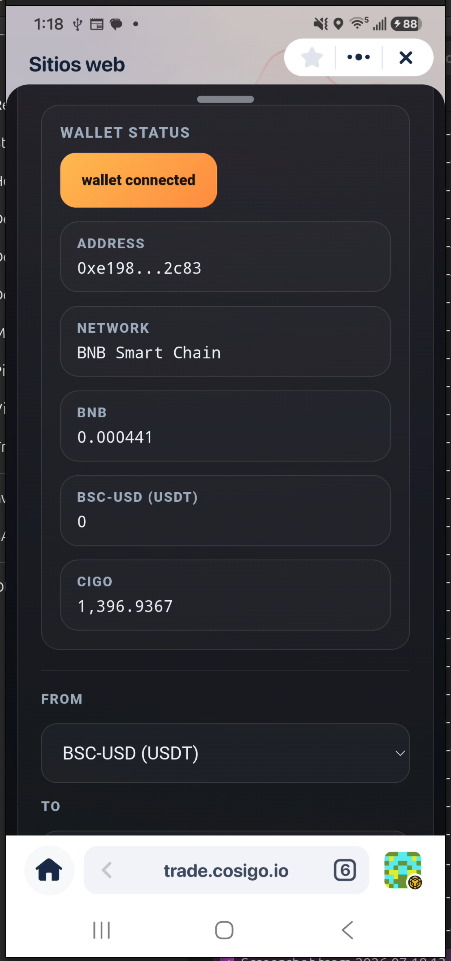
The page should say wallet connected. Confirm the network says BNB Smart Chain. Check that BNB and CIGO balances appear.

What should happenYour public wallet details appear. Nothing has been spent.

Connected CIGO wallet with BNB Smart Chain and balances
Connected wallet, correct network, and visible balances.

Part 3

Choose CIGO, USDT, and a small amount.

The page calls USDT BSC-USD (USDT). It means the digital dollars you will receive.

5

Choose the direction.

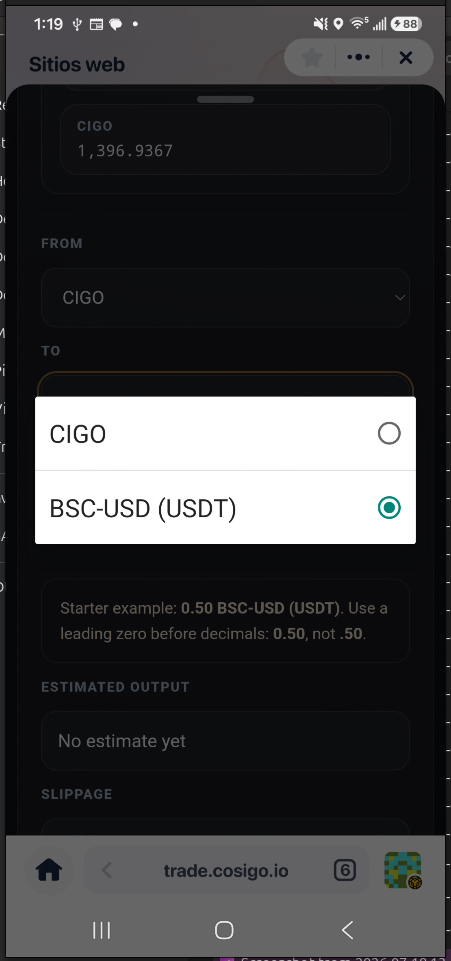
Under From, choose CIGO. Under To, choose BSC-USD (USDT).

Check thisCIGO → BSC-USD (USDT)

Selecting CIGO to BSC-USD USDT
CIGO leaves the wallet; USDT enters it.
6

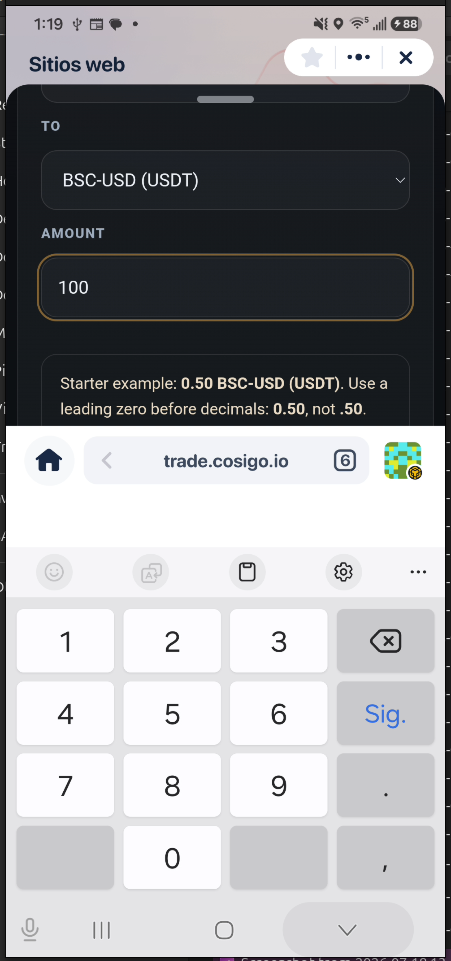
Enter the CIGO amount.

This real example uses 100 CIGO. A beginner should always start with a small test.

Type this example100

Entering 100 CIGO as the swap amount
Real example: exchanging 100 CIGO.
7

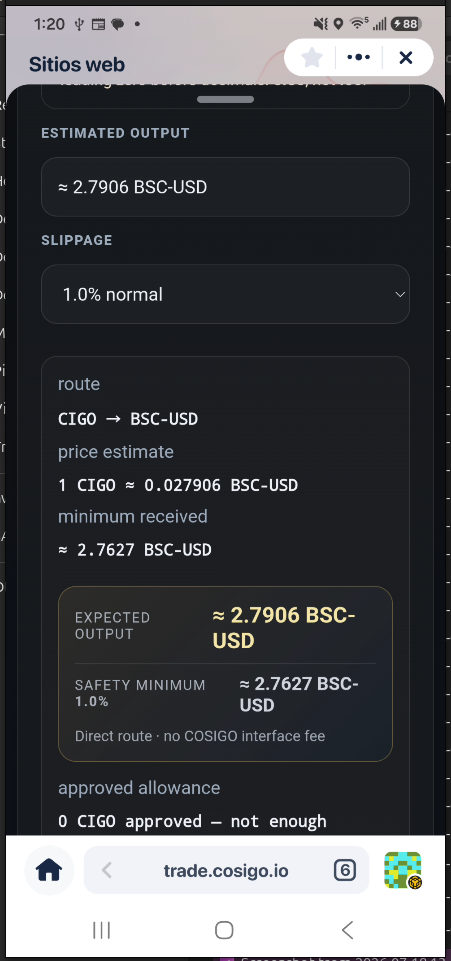
Ask for an estimate.

An estimate shows approximately how much USDT the pool can return at that moment. It is not final until the network accepts the exchange.

Press thisEstimate

What should happenThe example estimates about 2.79 USDT and displays a lower safety minimum.

CIGO swap estimate showing expected USDT
Review the estimate before giving permission.

Part 4

Give permission for exactly 100 CIGO.

A first exchange usually needs a separate permission. Nothing is exchanged during this permission step.

8

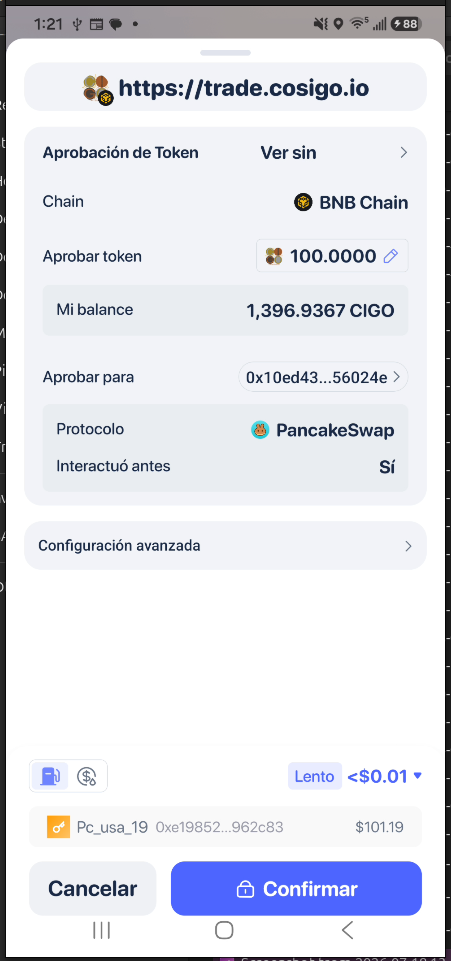
Review Rabby’s permission request.

Rabby should show CIGO, the exact amount, BNB Chain, and PancakeSwap. This example permits exactly 100 CIGO.

Press thisConfirmar only after every item is correct.

Stop ifThe amount is unlimited, the token is wrong, or the website is unfamiliar.

Rabby exact 100 CIGO approval confirmation
Exact 100 CIGO permission in Rabby.
9

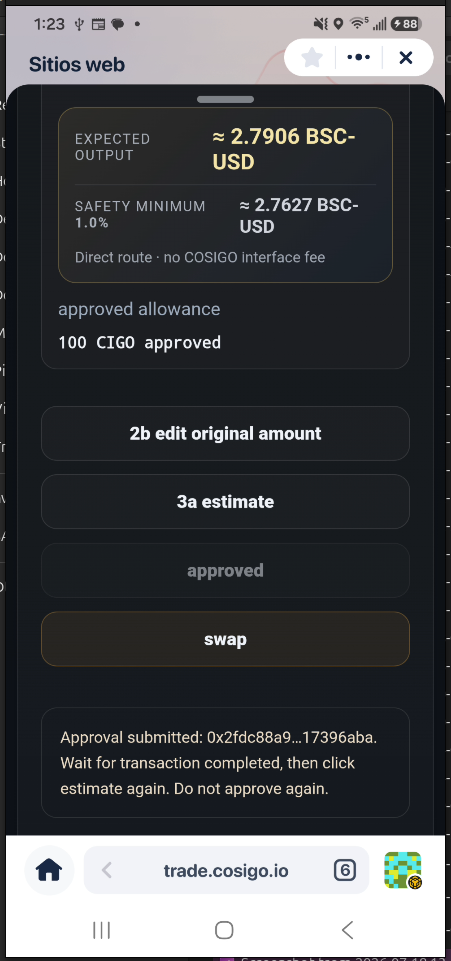
Wait, then estimate again.

After the permission finishes, return to the CIGO page. Press Estimate again. The Swap button becomes available.

What should happenThe page says 100 CIGO is permitted and shows the Swap button.

CIGO permission completed and swap button ready
Permission completed; the exchange itself has not happened yet.

Part 5

Complete the exchange.

This is the moment CIGO is exchanged for USDT. Rabby shows the result before you confirm it.

10

Review the exchange in Rabby.

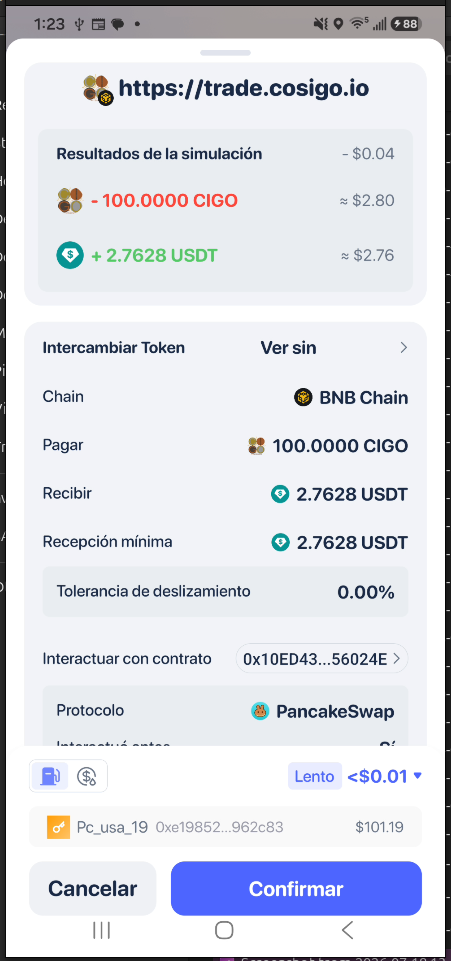
Rabby’s preview should show CIGO leaving and USDT arriving. Check the amounts and PancakeSwap before confirming.

Press thisConfirmar

Stop ifCIGO is not leaving, USDT is not arriving, or the amounts are very different from the estimate.

Rabby simulation of the CIGO to USDT swap
Rabby previews the exchange before it happens.
11

Copy the completed exchange receipt number.

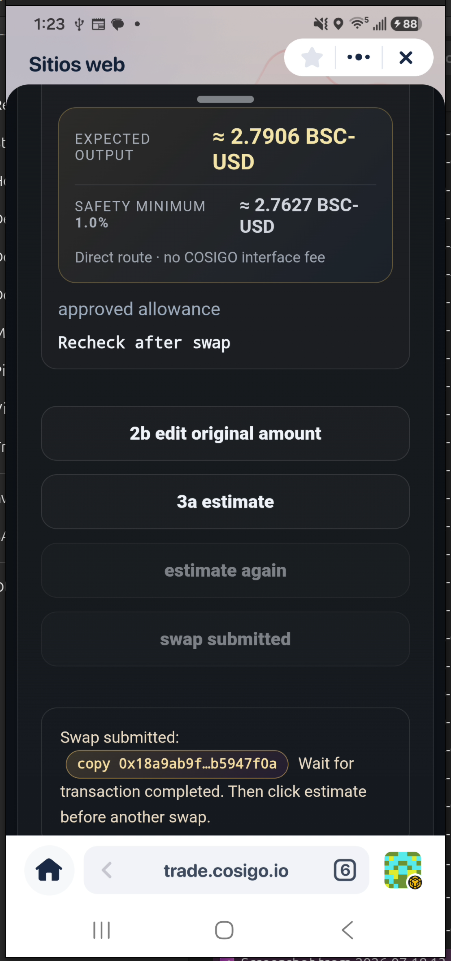
The long number beginning with 0x is the public receipt number. Its technical name is a transaction hash.

Press thisThe abbreviated hash beside Copy.

What should happenThe full receipt number is copied to the phone.

CIGO swap submitted with copyable transaction hash
Copy the swap receipt—not the earlier permission receipt.

Part 6

Check the result twice.

First check Rabby. Then use BscScan, the public BNB Smart Chain receipt checker.

12

Check Rabby’s history.

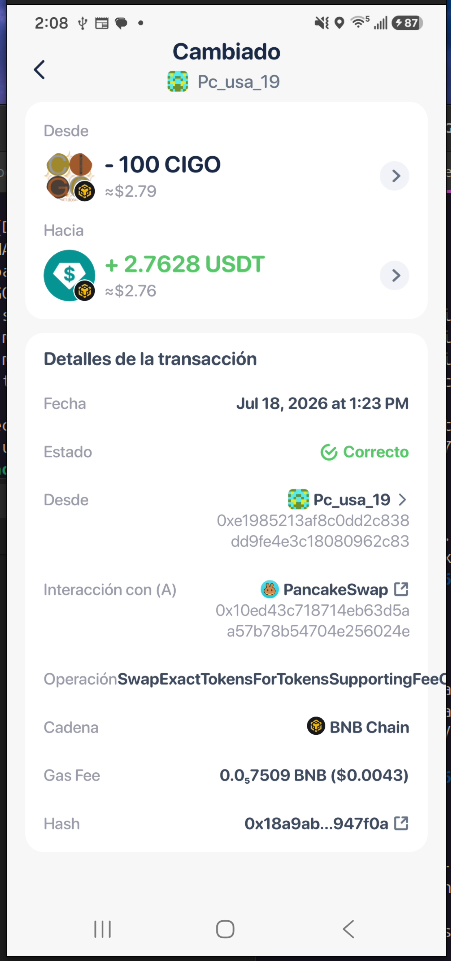
The completed exchange should show 100 CIGO leaving and approximately 2.7628 USDT entering. The status should say Correcto.

What should happenRabby shows a successful exchange on BNB Chain.

Rabby successful CIGO to USDT transaction details
Rabby’s completed exchange details.
13

Check the public receipt in Chrome.

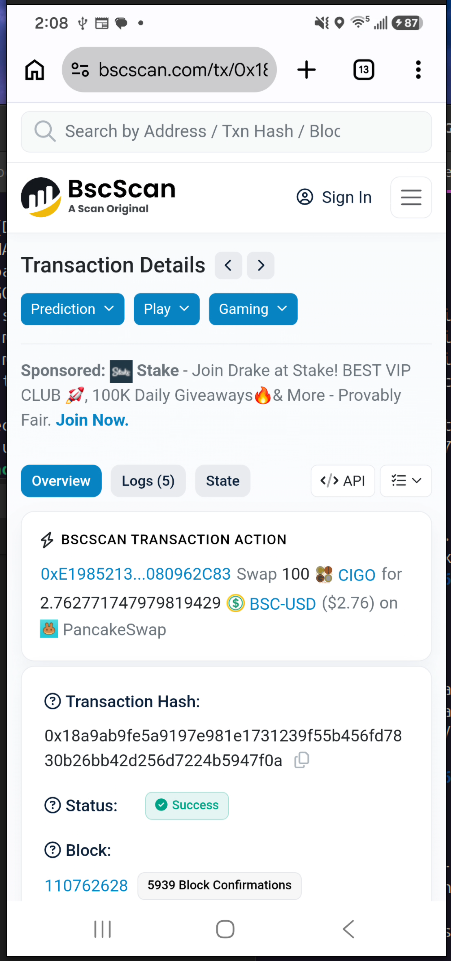
Copy the hash, open BscScan in Chrome, and paste it into the search box. Choosing Chrome prevents another wallet app from catching the history link.

Look for thisStatus: Success

Real exampleOpen this completed receipt on BscScan.

BscScan public receipt showing successful CIGO to USDT swap
BscScan confirms the public receipt succeeded.

Part 7

Reveal the Message Nugget.

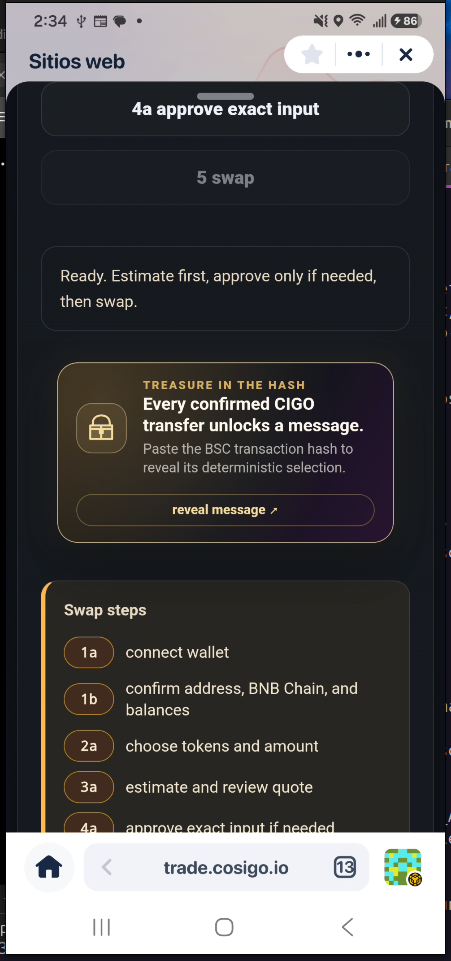
Every confirmed CIGO transfer can be matched to one permanent message. The viewer reads the public receipt. It never connects to the wallet and never asks for permission.

14

Open the message page.

Return to the CIGO page and press Reveal message, or open message.cosigo.io.

Press thisReveal message

Reveal message button on the CIGO swap page
The Message Nugget follows the completed exchange.
15

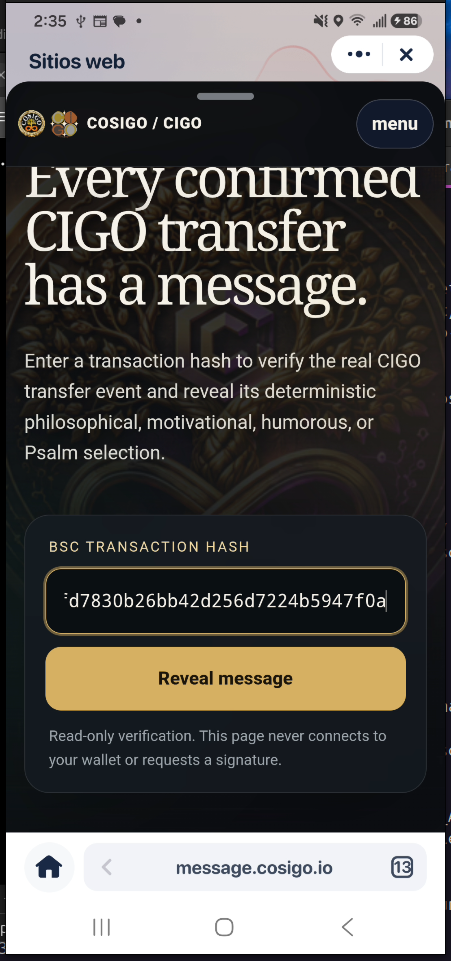
Paste the swap receipt number.

Paste the hash copied from the completed swap. Do not paste the earlier permission receipt.

Press thisReveal message

Correct swap hash entered in the CIGO Message Viewer
The correct completed-swap hash is entered.
16

Receive the permanent message.

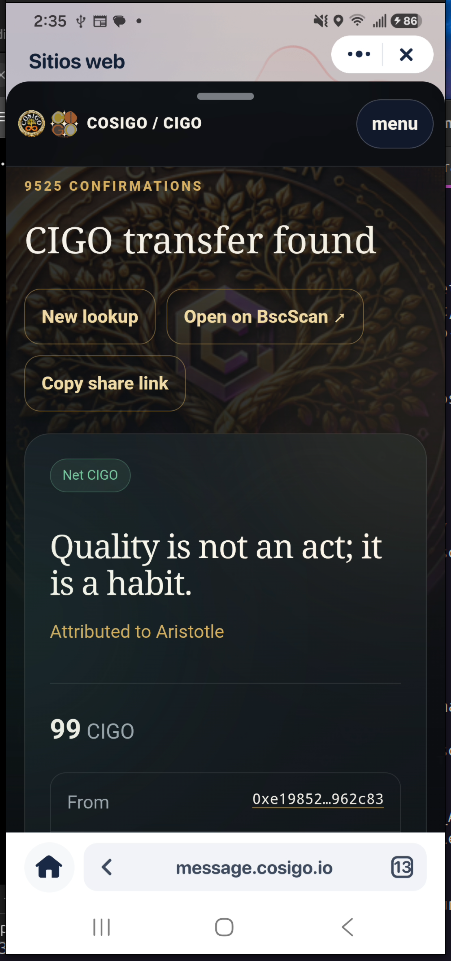
This real exchange reveals:

“Quality is not an act; it is a habit.”Attributed to Aristotle

What should happenThe same public receipt always returns the same Message Nugget.

CIGO Message Nugget saying Quality is not an act it is a habit attributed to Aristotle
The real Message Nugget from this completed exchange.
17

Understand the 100 CIGO example.

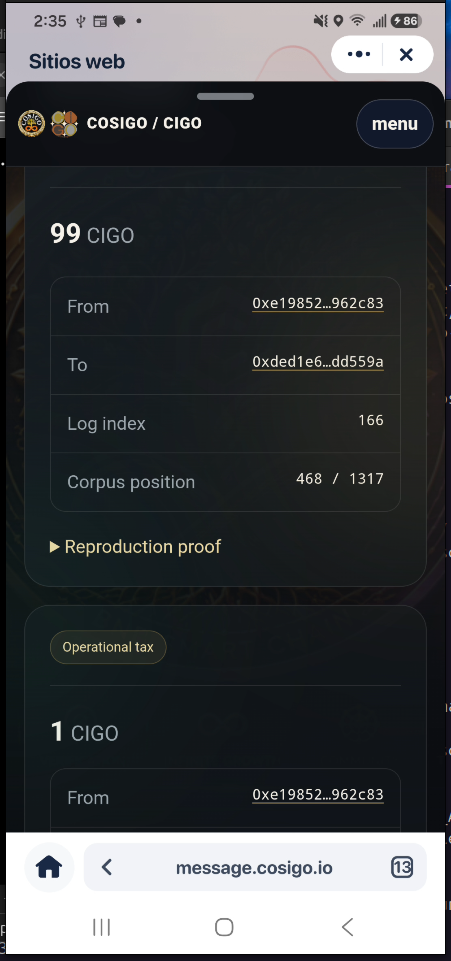
The receipt shows 99 CIGO as the net exchange amount and 1 CIGO as the operational tax. Together they equal the original 100 CIGO.

Final result100 CIGO left the wallet and approximately 2.7628 USDT arrived.

CIGO message proof showing 99 net CIGO and 1 CIGO operational tax
99 net CIGO plus 1 CIGO operational tax.

The real completed example

One exchange. One public receipt. One message.

Receipt number:
0x18a9ab9fe5a9197e981e1731239f55b456fd7830b26bb42d256d7224b5947f0a